Introduction
Chicken strips are comfort food royalty. They’re loved by kids, worshipped by snackers, and secretly respected by chefs when done right. The magic combo everyone wants? Golden, crunchy coating on the outside + juicy, tender chicken on the inside.
This recipe isn’t just “how to fry chicken.” It’s about technique, flavor layers, and why each step matters—so you don’t end up with soggy crust or dry chicken. Whether you’re cooking for family, game night, or just yourself at midnight, this recipe delivers.
A Brief History of Chicken Strips
Chicken strips (also called chicken tenders or fingers) became popular in the U.S. in the mid-20th century, riding the wave of fast food and casual dining. Restaurants wanted something:
- Easier to eat than bone-in chicken
- Faster to cook
- Perfect for dipping sauces
The cut usually comes from the chicken tenderloin, a small muscle under the breast—naturally tender, which is why it’s perfect for strips.
Why This Recipe Works (The Method Behind the Magic)
Crispy + tender is not luck—it’s food science:
- Brining or marinating keeps chicken juicy
- Cornstarch + flour combo = extra crunch
- Double coating builds a textured crust
- Correct oil temperature seals the outside fast, locking in moisture
Ingredients (Serves 4–6 Lovers of Crispy Chicken)
For the Chicken Marinade (Tender Inside)
- 1½ lbs chicken tenderloins (or sliced chicken breast)
- 1 cup buttermilk (or milk + 1 tbsp lemon juice)
- 1 tsp salt
- 1 tsp garlic powder
- ½ tsp paprika
- ½ tsp black pepper
For the Crispy Coating (Crunchy Outside)
- 1 cup all-purpose flour
- ½ cup cornstarch
- 1 tsp baking powder
- 1½ tsp paprika
- 1 tsp garlic powder
- 1 tsp onion powder
- ½ tsp cayenne pepper (optional, but loved)
- Salt & black pepper to taste
For Frying
- Vegetable oil / canola oil / peanut oil (enough for deep or shallow frying)
Step-by-Step Instructions
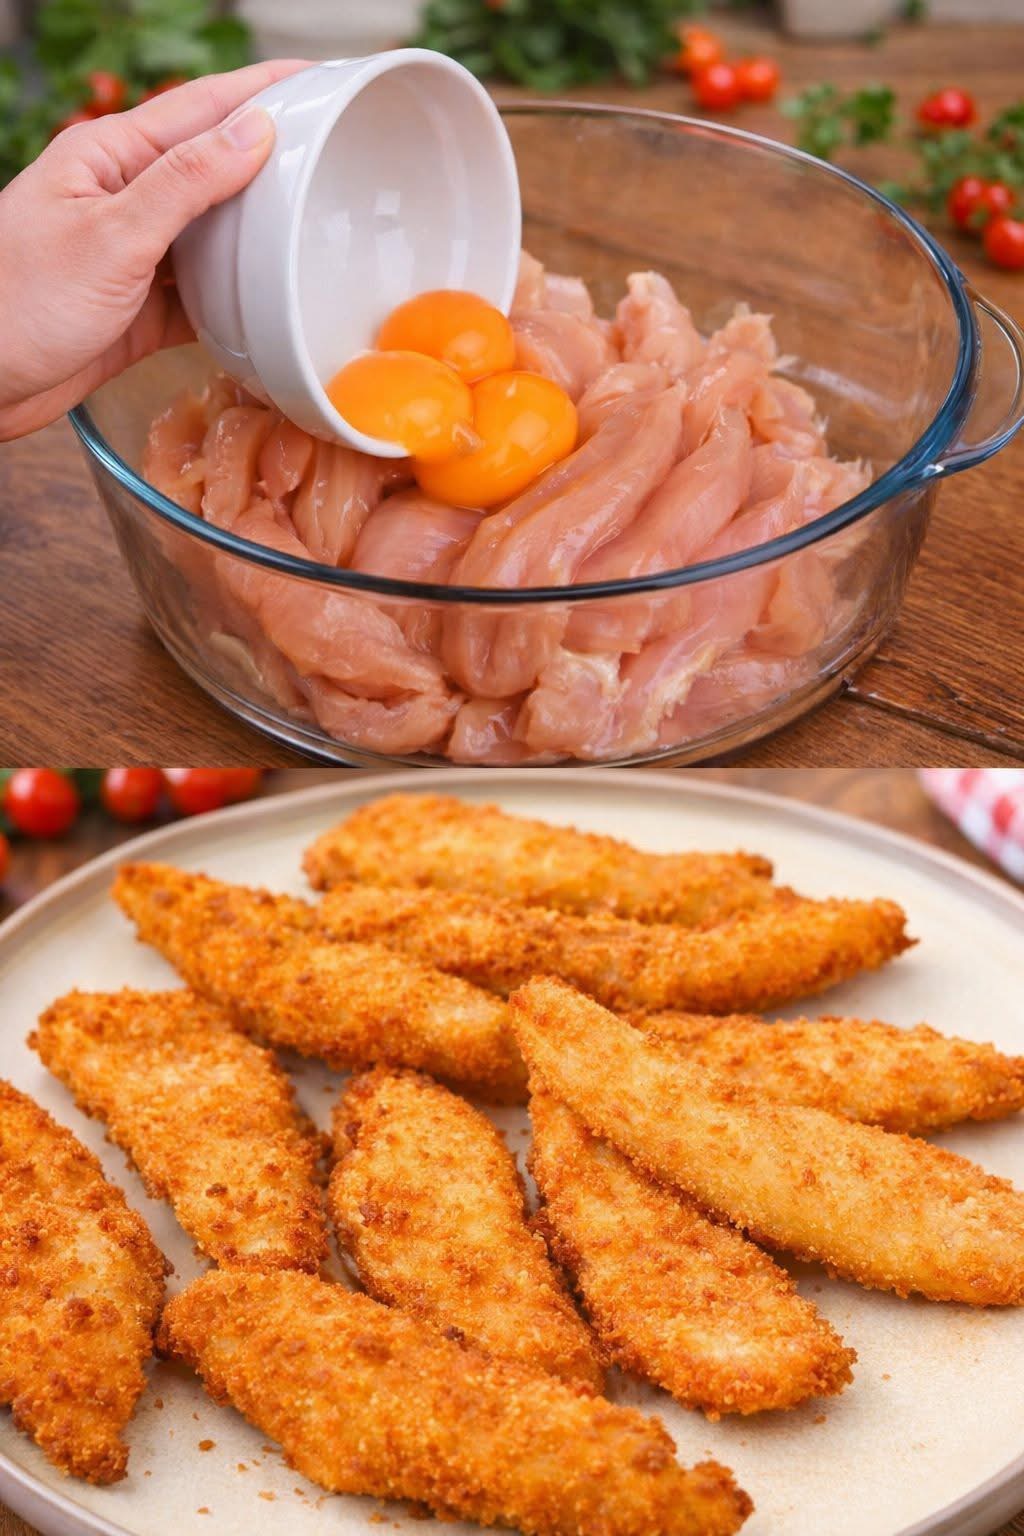
Step 1: Marinate for Tenderness
- In a bowl, mix buttermilk, salt, garlic powder, paprika, and pepper.
- Add chicken strips and coat well.
- Cover and refrigerate at least 1 hour (overnight = next-level juicy).
👉 This step is non-negotiable for tenderness.
Step 2: Prepare the Crispy Coating
- In a large bowl, whisk together flour, cornstarch, baking powder, and spices.
- Mix well so flavors are evenly distributed.
👉 Cornstarch + baking powder = airy, crackly crust.
Step 3: Coat Like a Pro (The Formation Stage)
- Remove chicken from marinade—don’t shake it dry.
- Dredge each strip in flour mixture.
- Press firmly so coating sticks.
- For extra crispiness, dip back into marinade and coat again.
👉 This “double coat” forms crunchy ridges that fry beautifully.
Step 4: Frying Method (Crispy Outside)
- Heat oil to 350°F / 175°C.
- Fry chicken in batches (don’t overcrowd).
- Cook 3–4 minutes per side until golden brown.
- Internal temp should reach 165°F / 74°C.
- Drain on a wire rack (not paper towels).
Alternative Cooking Methods
Oven-Baked (Healthier Option)
- Preheat oven to 425°F / 220°C
- Spray strips with oil
- Bake 18–22 minutes, flipping once
Air Fryer (Modern Favorite)
- 400°F / 200°C
- Spray lightly with oil
- Cook 12–15 minutes, shaking halfway
Still crispy. Still tender. Less oil. Win-win.
Benefits of Homemade Chicken Strips
- ✔ Control ingredients (less sodium, no mystery fillers)
- ✔ Fresh oil = better flavor
- ✔ Adjustable spice level
- ✔ Higher protein, better quality meat
- ✔ Way cheaper than takeout
For the Chicken Strip Lovers ❤️
These strips are perfect for:
- Kids with ketchup
- Adults with buffalo sauce
- Late-night snackers
- Game-day crowds
- People who “just wanted one” and ate seven
Pair with:
- Honey mustard
- Ranch
- BBQ
- Hot sauce
- Garlic mayo
Common Mistakes to Avoid
- ❌ Cold oil → greasy chicken
- ❌ Overcrowding pan → soggy crust
- ❌ Skipping marinade → dry chicken
- ❌ Low seasoning → bland sadness
Conclusion
Chicken strips are simple—but great chicken strips are intentional. When you marinate properly, season generously, and fry at the right temperature, you get the holy grail: crispy, crunchy outside and tender, juicy inside.